Your 64 GB Steam Deck fills up after two or three large installs, and every game becomes a juggling act. Learning how to upgrade steam deck ssd step by step solves that problem permanently, and the swap itself takes most people under an hour with a screwdriver and some patience. The reward is a console that holds your whole library without constant deletions.
Quick answer: Buy a single-sided M.2 2230 NVMe drive, open the back cover with a plastic pick, disconnect the battery, and swap the SSD in its shielded slot. Reimage SteamOS from a USB stick afterward. Your microSD card and cloud saves survive the swap, but internal data does not, so back up first.
This guide covers the tools, the exact order of steps, the mistakes that break clips or corrupt installs, and answers to the questions people ask before opening the shell.
What you need before starting
Gather everything first. A missing tool halfway through means leaving an open handheld on your desk, which invites lost screws and bent pins.
Tools and parts checklist
- M.2 2230 NVMe SSD. Capacity from 1 TB to 2 TB is the practical sweet spot. The drive must be single-sided, meaning chips on one face only, or it will not sit flat.
- A small Phillips PH0 or PH00 screwdriver. The Steam Deck uses tiny screws that strip easily with the wrong tip.
- A plastic opening pick or guitar pick. Never use a metal spudger on the back cover.
- A USB flash drive of at least 8 GB. This holds the SteamOS recovery image.
- A second computer. You need it to write the recovery image to the USB drive.
- A microSD card reader. Optional, but useful if you keep games on a card.
- A clean, well-lit workspace. A magnetic tray or a bowl for screws keeps them from rolling away.
Static electricity kills drives. Touch a grounded metal object before handling the new SSD, and avoid working on carpet in dry weather.
Choosing the right SSD
Not every 2230 drive works well in a handheld. Power draw matters because the Deck runs on a battery. Drives rated around 3.3 V and drawing modest power run cooler and drain less. Avoid drives with a heatsink; there is no room for one inside the shell.
Comparison: 2230 drive types for the Steam Deck
| Drive type | Fit and power | Best for |
|---|---|---|
| Single-sided 2230, low power | Fits the slot cleanly; modest heat | Most owners upgrading to 1–2 TB |
| Double-sided 2230 | Too thick; can flex the board | Not recommended |
| 2230 with heatsink | Will not close under the shield | Not recommended |
Check the label for "single-sided" or look at product photos before buying. A drive that is slightly too thick can press against the shield and cause contact problems.
Backing up your data before you open anything
Internal storage gets wiped during the swap, so back up now. Steam Cloud saves sync automatically for most games, but check that each title shows cloud sync enabled. Copy anything stored outside Steam, such as emulator saves or non-Steam games, to a microSD card or external drive. Note your installed game list if you want to reinstall the same titles.
Familiarity with clips and ribbon cables reduces the chance of damage.
Step-by-step instructions

Work slowly and keep screws organized by location. The whole job is about fifteen screws and one connector, so a steady hand matters more than speed.
Step 1: Power down and remove the microSD card
Hold the power button and choose shut down from the menu. Wait for the screen to go dark, then press the power button once to confirm it stays off. Eject the microSD card from its slot with your fingernail. Leaving the card in place can crack it when the back cover comes off.
Step 2: Remove the eight back screws
Place the Deck face down on a soft cloth. Unscrew the eight Phillips screws around the perimeter. They are different lengths, so set each one next to its hole or draw a simple diagram. Keep them in a tray so they do not roll.
If a screw head starts to slip before it comes free, stop before you make it worse. This guide on how to remove a stripped screw from a laptop casing covers the same tiny Phillips screws and soft metal found in handhelds.
Step 3: Pry the back cover loose
Slide a plastic pick into the seam near a corner and work around the edge. You will hear clips pop. Do not yank the cover upward; lift it gently once the edges release. Set the cover aside with the inside facing up.
Step 4: Disconnect the battery
Find the battery connector near the center of the board. Slide the metal pull tab or use a plastic tool to lift the connector straight up. This cuts power so nothing shorts while you work. Wait a few seconds before touching anything else.
Step 5: Remove the SSD shield and old drive
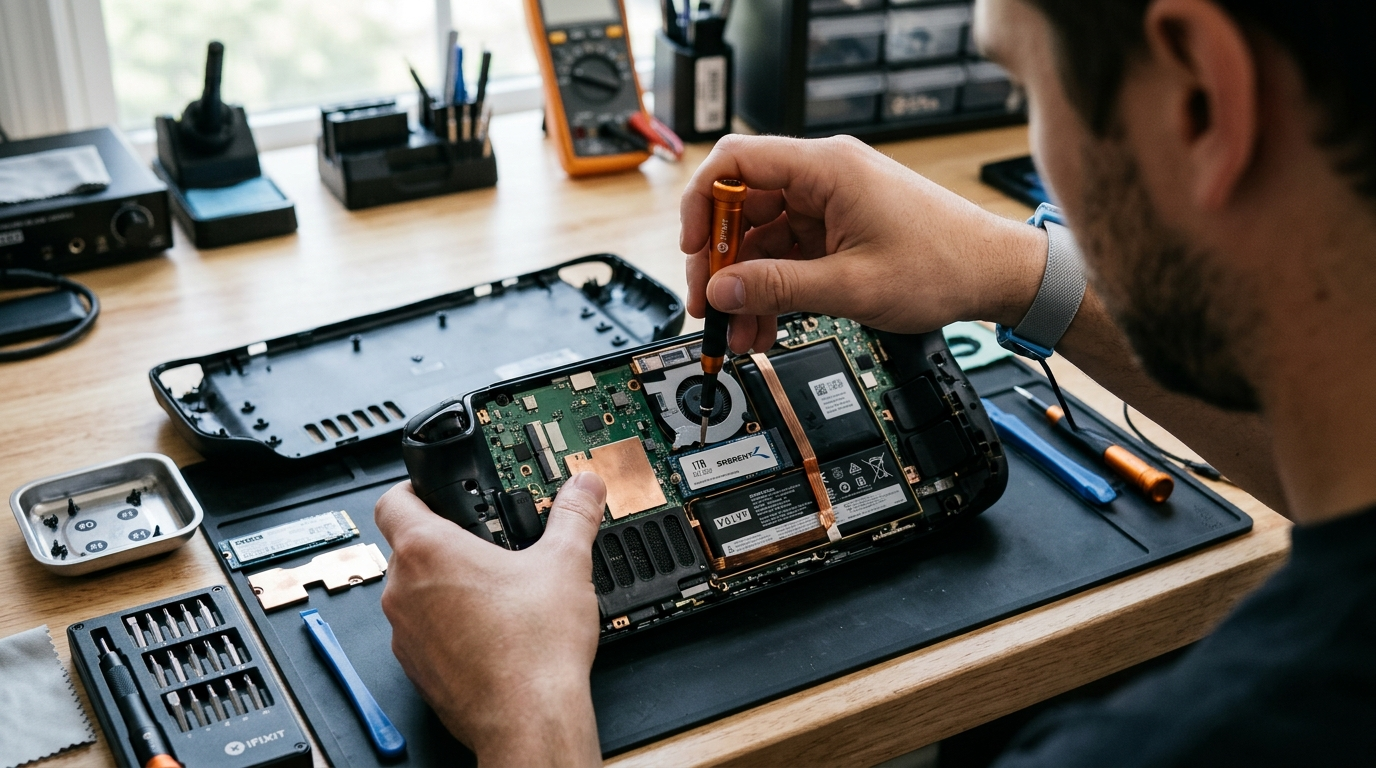
The SSD sits under a metal shield held by a few small screws. Remove them and lift the shield. Unscrew the single screw holding the drive at its far end. The drive tilts up at a slight angle, then slides out of the connector. Pull gently and keep the old drive safe in case you need to reinstall it.
Step 6: Install the new SSD
Slide the new drive into the connector at the same angle, then press it flat. Replace the retaining screw, but tighten only until snug; overtightening can crack the board. Refit the metal shield and its screws.
If the new drive does not sit flush, check its orientation. A drive inserted upside down will not seat, and forcing it damages the connector.
Step 7: Reconnect the battery and close the shell
Push the battery connector back down until it clicks. Line up the back cover and press around the edges until every clip seats. Reinstall the eight screws, tightening them in a crisscross pattern so the cover sits evenly.
Step 8: Reimage SteamOS from USB
On your computer, download the SteamOS recovery image from Valve’s official support page and write it to the USB drive with a tool like Rufus or balenaEtcher. Plug the drive into the Deck through a USB-C hub or adapter. Hold the volume-down button while pressing power to open the boot menu, then select the USB drive. Choose the reimage option and follow the prompts.
Step 9: Restore your games and saves
After the first boot, sign in to Steam and reinstall your library. Cloud saves download automatically. Reinsert your microSD card and confirm its games still appear. Check storage settings to verify the new capacity shows correctly.
Tips for better results
Small habits separate a clean upgrade from a repair job. These practices cost little time and prevent most problems.
Keep track of every screw
The Steam Deck uses several screw lengths, and a long screw in a short hole can damage the shell. Tape screws to a sheet of paper labeled by location, or use a magnetic mat with sections. Count them before closing: eight for the back cover, plus the shield and drive screws.
Handle ribbon cables with care
The triggers and buttons connect through thin ribbon cables. Lift them by their pull tabs, never by the cable itself. If a cable pops out, reseat it squarely before closing the shell. Bent ribbon cables cause buttons that stop responding.
Test before final assembly
Reconnect the battery and power on with the back cover still loose. If the Deck boots to the recovery screen or a low-battery warning, the drive is seated correctly. This quick check saves you from reopening a fully assembled unit.
Use a reliable USB drive and writer
A slow or failing USB stick can stall the reimage process midway. Use a name-brand drive formatted fresh before writing. Verify the image finished writing without errors, and keep the Deck plugged into its charger during the reimage.
The Deck needs adequate charge for firmware updates during reimaging. Keep the charger connected for the entire process.
Consider a fresh start for your library
A new drive is a good moment to reinstall only the games you actually play. Fewer large installs mean faster updates and more free space for shader caches. If you keep a large microSD card, move indie titles there and leave the SSD for big releases.
Common mistakes to avoid
Most failed upgrades trace back to a handful of avoidable errors. Knowing them in advance is cheaper than replacing parts.
Leaving the microSD card inserted
The card protrudes slightly from its slot, and the back cover hooks over it. Forcing the cover can snap the card or damage the slot. Always remove it as the first step, not the last.
Skipping the battery disconnect
Working on a powered board risks shorting components. The battery connector is designed to be unplugged, so use it every time. Skipping this step is the most common cause of dead Decks after a swap.
Buying the wrong SSD size or thickness
A standard 2280 drive will not fit; only 2230 fits. Double-sided drives and models with heatsinks cause fitment problems. Confirm the form factor and single-sided design before checkout.
Overtightening screws
Tiny screws in plastic threads strip easily. Tighten until the screw stops turning easily, then stop. A stripped screw hole cannot be repaired without a replacement shell.
Forgetting to back up non-Steam data
Cloud saves cover Steam games, not emulator saves, mods, or files copied to the desktop. Copy those to a microSD card or external drive before the swap. Losing a 40-hour save file stings more than any hardware cost.
Interrupting the reimage process
Pulling the USB drive or losing power mid-reimage leaves the Deck in an unbootable state. Let the process finish completely, even if it seems slow. If it fails, start over from the beginning rather than rebooting blindly.
If the Deck will not power on after assembly, reopen it and check the battery connector first. A partially seated connector is the usual culprit.
FAQ
How much does a Steam Deck SSD upgrade cost?
A 1 TB single-sided 2230 drive typically runs in the range of a mid-priced game, and 2 TB models cost more. Add the price of a USB drive if you do not own one. There is no labor cost if you do the swap yourself.
Will I lose my games and saves when I swap the SSD?
Games must be reinstalled, but Steam Cloud saves usually restore automatically after you sign in. Any data outside Steam is gone unless you back it up first. Your microSD card keeps its contents.
Does upgrading the SSD void the warranty?
Opening the device can affect warranty coverage, so check Valve’s current policy for your region before you start. Keep the original drive; reinstalling it before any service request is a sensible precaution.
Can I clone my old drive instead of reimaging?
Cloning is possible with an external enclosure, but reimaging from USB is the more reliable path for most people. A clean install avoids partition errors and takes about the same time. Cloning mainly helps if you have heavily customized your setup.
How long does the whole upgrade take?
Plan on about 45 to 90 minutes, including the reimage and first boot. Downloading games again takes the longest, depending on your connection speed. The physical swap itself is usually under 30 minutes.
Conclusion
Swapping the SSD turns a cramped 64 GB Deck into a handheld that holds a full library. The process comes down to a few essentials: the right 2230 drive, a plastic pick, a careful battery disconnect, and a clean SteamOS reimage from USB. Back up non-Steam data first, keep screws organized, and test before you close the shell.
Your next move is simple. Order a single-sided 2230 drive and an 8 GB USB stick, then set aside an evening for the swap and reinstall.