In a few years after its appearance on the market, the mobile phone has had significant development. While with the first mobile phones, it was only possible to make and receive calls or text messages. With the most advanced smartphones, it is possible to carry out many activities, thanks to the birth of advanced operating systems, such as Android, iOS, or Windows Phone. In the following guide, we will see how to put apps in a folder on android.
How to put apps in a folder on android?
It may happen that by installing many applications on our device, a mess is created; in these cases, finding the application we want to use can become quite frustrating. To solve the problem, we can group all applications of the same type into folders to find all our apps easily.
Create the folder
Now we will explain how to create folders for files and applications with a simple guide:
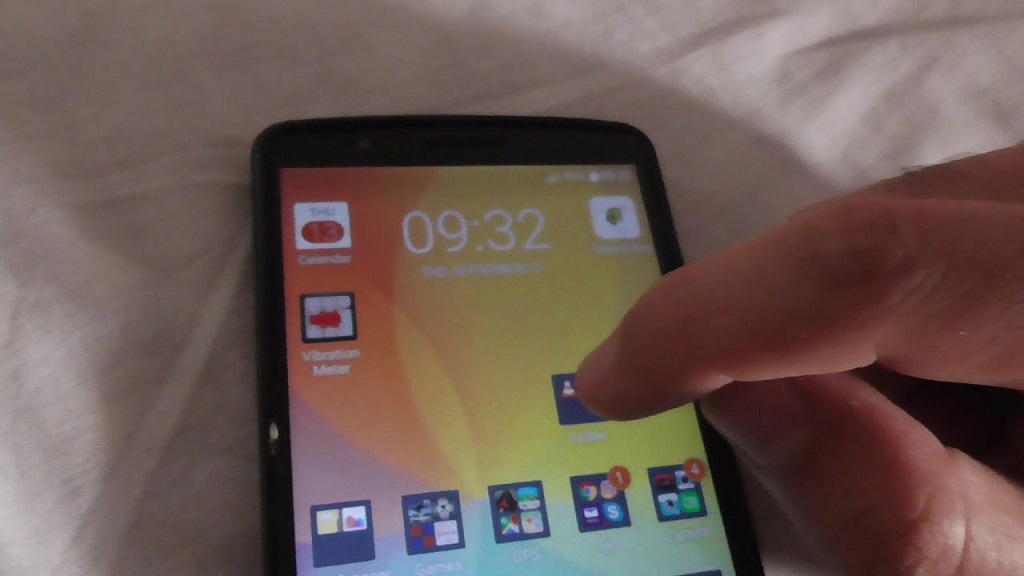
- Let’s start by putting ourselves on the main screen, the “Home” of the Android device, in which we want to create the new folder;
- We press the screen in a free position and wait for a new window that contains more items to open;
- Now select the item “Folders,” The operating system will ask us to give a name to the new folder we are creating. Let’s name the folder and give the ok: we will see the folder appear on the screen;
- If we want to insert an application into the folder, we must go to the applications menu, then hold down on the desired application and wait for the mobile phone to return to the main screen, the Home, at this point, always holding down we will move the application over the created folder;
- We repeat the same operation of the previous point if we want to insert other applications inside the folder;
- If we want to delete an application from the folder, we must enter the folder itself and hold it down on the application in question. Red trash will appear at the bottom of the screen, drag the application over the trash, and delete it from the folder.
Move the apps into the folder
Then move the affected apps into the folder. For example, if you have created a folder and called it “Social,” you can move all the social apps, such as Facebook, Twitter, etc., into it to have a well-organized interface. To move apps into the folder, simply move them to it; this way, the apps will automatically be added to the folder.
Use system options
In some cases, it is possible to automate this organizational process directly by exploiting system options. Press and hold on to an empty area of the Home screen, and look for any item related to the organization of the apps. Sometimes you may be able to choose to organize apps automatically into thematic folders, saving you the trouble of doing it manually.
Use an app
Alternatively, you can install apps specifically suited for this purpose from the Play Store. Type “app organizer” in the search box and choose an app to install. I recommend “Auto app organizer free.” Then, proceed with the installation, and once finished, open the app. I am sure you will have benefited from a more effective organization of the applications of your smartphone.
To put apps in a folder, we leave you with 3 other useful pieces of information:
1) When we go to delete an application from the folder, we are not going to delete the application from the phone. It will remain in memory and we could access it from the applications menu.
2) To create the folder, we can also proceed in another way: press the menu key on the Home screen and select the Add item from the pop-up window. Once this selection has been made, the same window as before will appear where this time we will select the Folders item.
3) Also, to add applications to the folder, we can proceed in another way: by entering the folder we have created, press the phone menu key, and select the Add item. At this point in the window that appears, we select the Applications item.
You may also like to read, The Importance of Social Networks in Current Education